 Pin It
 One Saturday morning, I pulled a baking sheet from the oven and the whole kitchen smelled like toasted honey and cinnamon. My daughter wandered in, still half asleep, drawn by the scent alone. She grabbed a cluster before it even cooled, burned her fingers a little, and declared it the best thing I'd made all month. That's when I knew this granola wasn't just breakfast, it was the kind of thing that turns ordinary mornings into something worth waking up for.
I started making this after a friend brought a jar to brunch and refused to share the recipe until I promised to invite her over for the first batch. We stood in my kitchen that afternoon, pressing the mixture flat on the pan with the back of a spatula, and she told me the secret was patience. Don't stir it while it cools, she said, or you'll end up with expensive oatmeal. She was right.
Ingredients
- Old-fashioned rolled oats: The backbone of every cluster, they toast up golden and hold everything together without turning mushy.
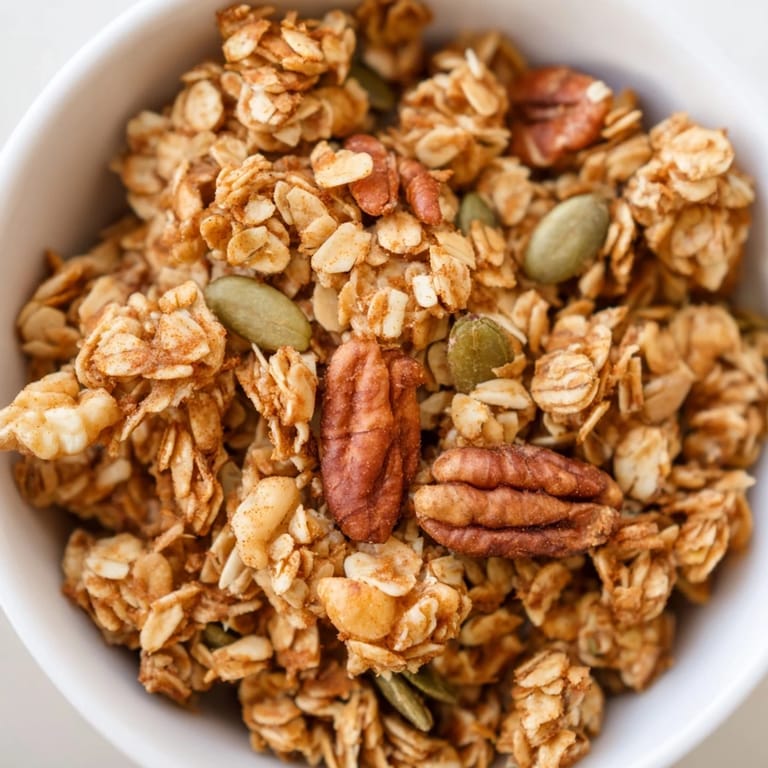
- Mixed nuts: I use almonds, pecans, and walnuts because they each bring a different texture, but you can swap in whatever you have or love most.
- Shredded unsweetened coconut: Adds a subtle sweetness and extra crunch, but you can leave it out if coconut isn't your thing.
- Pumpkin seeds or sunflower seeds: These little guys toast beautifully and add a quiet, nutty depth that balances the honey.
- Ground cinnamon: Just enough to make the whole batch smell like a hug without tasting like a spice cabinet.
- Fine sea salt: Don't skip it, salt makes the sweetness sing and keeps everything from tasting flat.
- Honey: The glue that binds the clusters and caramelizes into that deep, golden crust you can't stop picking at.
- Melted coconut oil: Helps everything crisp up and adds a hint of richness, but any neutral oil works if that's what you have.
- Vanilla extract: A small splash that rounds out all the flavors and makes the whole batch taste finished.
- Dried cranberries, raisins, or apricots: Stir these in after baking so they stay chewy and don't turn into little rocks in the oven.
- Dark chocolate chips: Totally optional, but if you add them once the granola cools, you'll understand why I almost never skip them.
Tired of Takeout? 🥡
Get 10 meals you can make faster than delivery arrives. Seriously.
One email. No spam. Unsubscribe anytime.
Instructions
- Preheat and Prep:
- Set your oven to 325°F and line a large baking sheet with parchment paper. This low temperature toasts everything evenly without burning the edges before the center gets golden.
- Mix the Dry Ingredients:
- Toss the oats, nuts, coconut, seeds, cinnamon, and salt together in a big bowl until everything looks evenly distributed. This is your base, make sure nothing clumps together dry or hides at the bottom.
- Whisk the Wet Ingredients:
- In a smaller bowl, whisk the honey, melted coconut oil, and vanilla until smooth and pourable. The warmth of the oil keeps the honey loose and easy to mix.
- Combine and Coat:
- Pour the wet mixture over the dry ingredients and stir with a wooden spoon or your hands until every oat and nut is shiny and sticky. You want it to start clumping in your hands, that's the promise of clusters to come.
- Spread and Press:
- Dump the mixture onto your prepared baking sheet and spread it into an even layer. Use the back of a spatula to press it down firmly, this pressure is what creates those big, crunchy chunks instead of loose crumbs.
- Bake Until Golden:
- Slide the pan into the oven and bake for 22 to 25 minutes, rotating halfway through so it browns evenly. You're looking for a deep golden color and a smell that makes you want to pull it out early, resist.
- Cool Completely:
- Take the pan out and set it on the counter, then walk away and don't touch it for at least an hour. Stirring or breaking it too soon will ruin the clusters, patience is everything here.
- Break and Store:
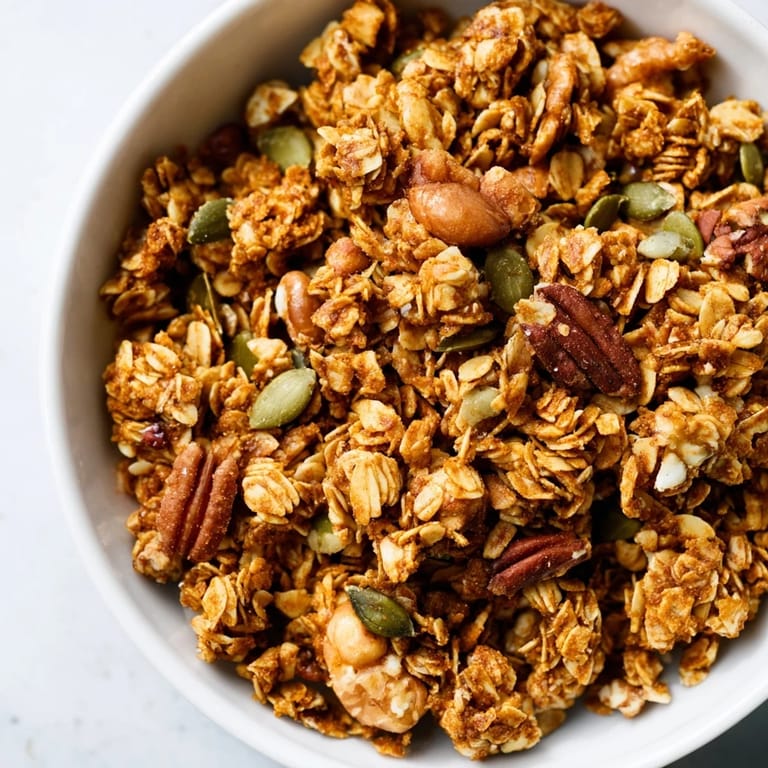
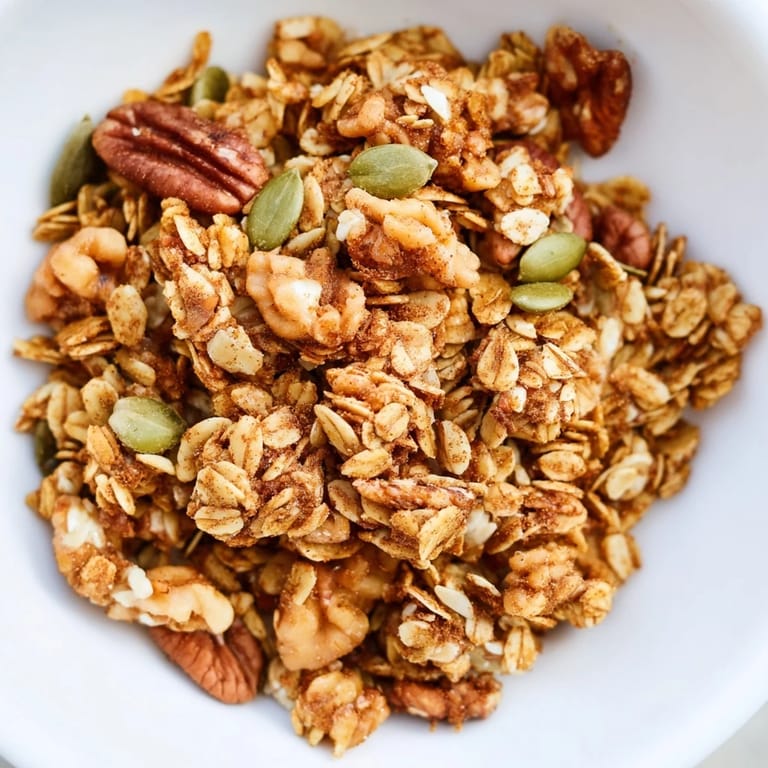
- Once it's completely cool and set, break the sheet into big, irregular chunks. Stir in any dried fruit or chocolate chips now, then transfer everything to an airtight container where it'll stay crispy for at least two weeks.
 Pin It
 The first time I brought this to a potluck, someone asked if I'd ordered it from a fancy market. I just smiled and said I made it that morning, and by the end of the night three people had texted asking for the recipe. It's become my go to gift, the thing I make when I want to show up with something that feels generous and tastes like I put in more effort than I actually did.
How to Get the Best Clusters
The secret to big, crunchy clusters is in the pressing and the patience. After you spread the mixture on the pan, use the flat bottom of a measuring cup or a spatula to press everything down firmly, almost like you're packing it. Then, once it comes out of the oven, resist every urge to poke, stir, or taste it. Let it cool completely on the pan, undisturbed, and the honey will harden into a golden glue that holds everything together. When you finally break it apart, you'll have thick, uneven chunks that look like they came from a bakery.
Flavor Variations to Try
This recipe is endlessly adaptable depending on what's in your pantry or what mood you're in. Swap the cinnamon for cardamom and add a pinch of ginger for a chai-spiced version that's perfect in the fall. If you love tropical flavors, use extra coconut, add macadamia nuts, and toss in dried pineapple after baking. For a more savory-sweet twist, cut the honey slightly and add a tiny drizzle of maple syrup with a handful of roasted cashews and a sprinkle of sea salt on top before baking. Every version I've tried has become someone's new favorite.
Storing and Serving Ideas
Once your granola is completely cool and broken into clusters, store it in an airtight container or a big glass jar with a tight lid. It stays crispy at room temperature for up to two weeks, though in my house it rarely lasts that long. I keep a jar on the counter and scoop it over yogurt, sprinkle it on smoothie bowls, or just grab a handful when I need a quick snack.
- Layer it with Greek yogurt and fresh berries for an easy breakfast parfait that feels fancy but takes two minutes.
- Pack small bags of it for road trips, hiking snacks, or lunchbox treats that won't get squished.
- Crumble it over vanilla ice cream or baked apples for a dessert that tastes indulgent but sneaks in something wholesome.
 Pin It
 There's something deeply satisfying about pulling a pan of homemade granola from the oven and knowing you made something this good from scratch. It's the kind of recipe that turns into a habit, then a tradition, then the thing people start expecting you to bring.
Recipe FAQs
- → How do I prevent granola from being too clumpy?
Press the mixture gently onto the baking sheet with a spatula before baking. Rotate the pan halfway through cooking for even browning. Avoid stirring while cooling, as this helps clusters set properly and maintain their structure.
- → Can I make this dairy-free or vegan?
Yes! Substitute honey with maple syrup for a fully vegan version. The coconut oil is already plant-based, making this naturally dairy-free. All other ingredients work perfectly for vegan diets.
- → What's the best way to store homemade granola clusters?
Store cooled clusters in an airtight container at room temperature for up to 2 weeks. Keep them dry to maintain crunchiness. Avoid storing in the refrigerator, as moisture can soften the clusters.
- → Can I swap nuts or add different seeds?
Absolutely! Mix and match almonds, pecans, walnuts, or cashews based on preference. Add chia seeds, flax seeds, or pumpkin seeds for extra nutrition and crunch. Keep the total amount around 1 cup of nuts and seeds.
- → Why does my granola burn while baking?
Honey and coconut oil can brown quickly at high temperatures. Bake at 325°F and rotate the pan halfway through. Watch closely during the final minutes—clusters should be golden, not dark brown. Adjust oven temperature if needed.