 Pin It
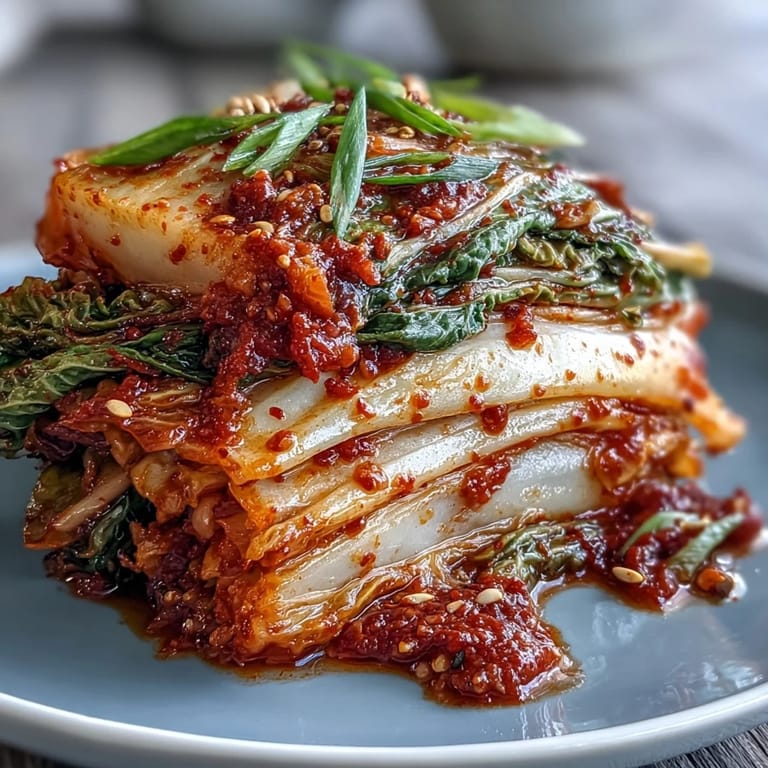
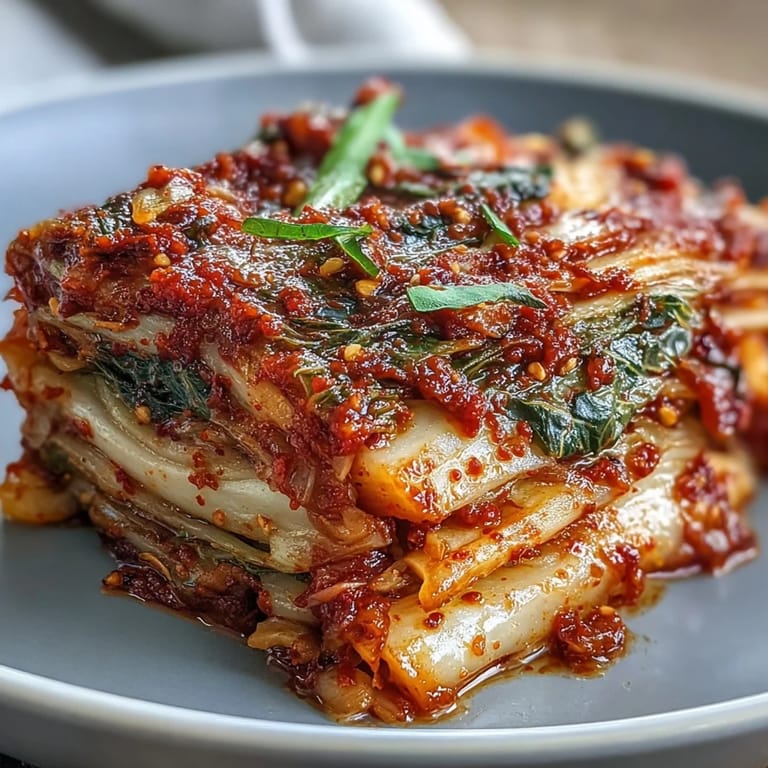
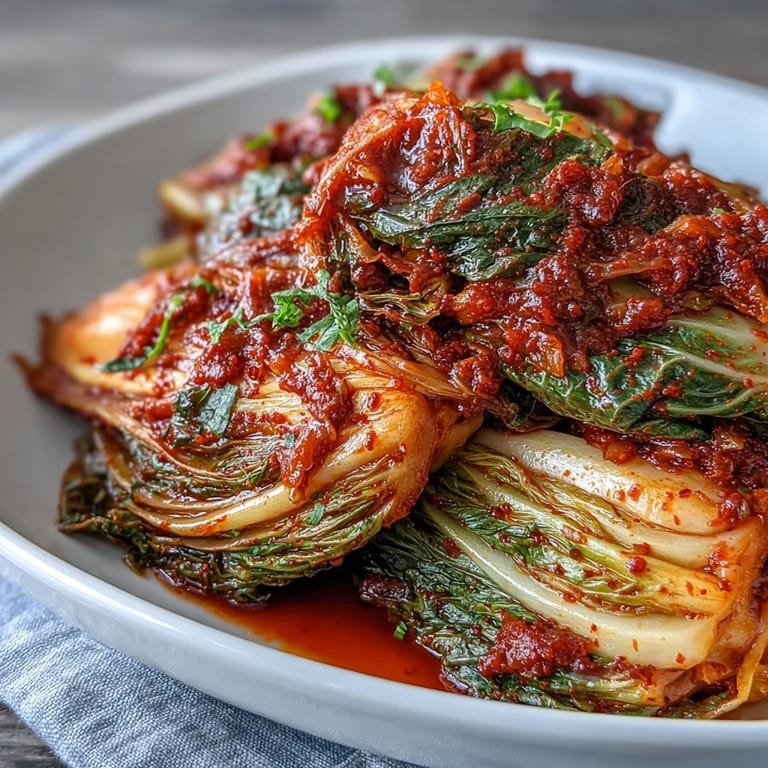
 My first batch of kimchi happened by accident, really—I'd bought far too much napa cabbage at the market and found myself staring at wilting leaves, when my Korean neighbor casually mentioned she made hers every winter. Three hours later, I was elbow-deep in a salty brine, my kitchen smelling like garlic and ginger, and my hands already stained red from the chili flakes. That batch taught me that fermentation isn't magic; it's just patience meeting chemistry, and the payoff is undeniably worth the wait.
I served my third batch to friends on a random Tuesday night, and someone asked if I'd bought it from a Korean restaurant—that's when I knew the learning curve had paid off. Watching people's faces light up when they tasted the balance of heat, tang, and that crisp crunch was genuinely better than any compliment about other dishes I'd made. Kimchi stopped being just a side dish that night and became my kitchen calling card.
Ingredients
- Napa cabbage: The backbone of your kimchi—choose one with tightly packed pale green leaves, as loose varieties can turn mushy during fermentation.
- Daikon radish: Adds peppery crunch and sweetness that balances the spice beautifully.
- Coarse sea salt: Don't use iodized table salt; it'll cloud your brine and throw off the flavor profile.
- Korean red chili flakes (gochugaru): The signature element that defines kimchi's color and heat—buy from a Korean market if possible for the best quality and potency.
- Fish sauce: This umami powerhouse seems funky on its own, but it dissolves into the paste and creates incredible depth.
- Rice flour paste: Acts as a gentle thickener and helps distribute the spices evenly without overwhelming the vegetables.
- Garlic and ginger: These aromatics are your flavor foundation—don't skimp on freshness here.
Tired of Takeout? 🥡
Get 10 meals you can make faster than delivery arrives. Seriously.
One email. No spam. Unsubscribe anytime.
Instructions
- Prepare the Cabbage:
- Slice your napa cabbage lengthwise into quarters, then chop into 2-inch pieces—this size balances manageability with surface area for the brine to penetrate. Keep your cuts consistent so everything ferments evenly.
- Salt and Soak:
- Mix your sea salt into cold water until dissolved, then submerge the cabbage pieces, weighing them down with a plate so they stay underwater. Toss every 30 minutes for 2 hours—this wilts the leaves and draws out water, making room for the spice paste to really cling to every layer.
- Rinse Thoroughly:
- Drain your cabbage and rinse it 2 to 3 times under cold running water, squeezing gently to remove excess salt. You want it seasoned, not briny—this is where patience with rinsing makes the difference between great kimchi and overly salty batches.
- Make the Spice Paste Base:
- Whisk rice flour with water in a small pan over medium heat, stirring constantly until it thickens into a smooth paste (about 1 to 2 minutes). Let it cool completely—warm paste will clump when you blend it.
- Blend the Aromatics:
- Combine your cooled rice paste, minced garlic, ginger, chopped onion, fish sauce, and sugar in a blender, pulsing until completely smooth. Once blended, stir in your gochugaru gradually, tasting as you go to find your heat level.
- Massage and Coat:
- Put on kitchen gloves (your hands will turn red otherwise), add your drained cabbage, radish, carrot, and scallions to a large bowl, then pour the spice paste over everything. Massage gently but thoroughly, working the paste into every leaf and crevice—this is meditative and essential for even fermentation.
- Pack and Press:
- Transfer your coated vegetables into clean glass jars, pressing down firmly as you go to eliminate air pockets and submerge everything under its own juices. Leave about an inch of headspace at the top, as fermentation creates pressure.
- Ferment with Daily Burps:
- Seal your jars and leave them on the counter away from direct sunlight for 1 to 2 days, opening the lid each day to release the gas buildup. You'll hear little hisses and smell increasingly tangy aromas—that's fermentation working.
- Taste and Transition:
- After 48 hours, open a jar and taste—if it's sour and tangy enough for you, move it to the refrigerator where fermentation slows dramatically. It'll continue developing flavors for weeks, getting more complex and funkier if you like that.
 Pin It
 There's a moment—usually around day three—when you open a jar and the smell hits you, and you realize you've successfully created something that didn't exist before, something alive and cultured and real. That moment erases any doubt about whether the effort was worth it, and suddenly fermentation stops feeling like a task and feels like quiet kitchen alchemy.
Choosing Your Heat Level
Gochugaru comes in varying intensities, and your local Korean market might have mild, medium, and hot options—don't assume they're all the same heat. Start with 3 tablespoons and taste your paste before adding more; you can always go spicier, but you can't dial it back once it's mixed in. I've learned that some people's "medium" is another person's "why is my mouth on fire," so trust your palate over the recipe.
Temperature and Timing
The warmer your kitchen, the faster fermentation happens—and faster isn't always better, because slower fermentation develops more complex, layered flavors. If your house runs cool, don't panic; your kimchi will just take longer, and you might end up with something even more interesting. I've had batches ferment in 2 days during summer heat waves and others that took nearly a week in a chilly spring kitchen, and honestly, the slow ones tasted better.
Storage and Longevity
Once you move your kimchi to the refrigerator, it'll keep for months if you always use clean utensils to remove what you need and keep the jar sealed between uses. The cold slows fermentation almost to a standstill, but flavor continues to deepen, which means your batch at week four tastes noticeably different—and usually better—than week one. Store it in glass, never plastic, because the spices and acid will leach into plastic over time.
- If liquid evaporates slightly, don't add more—just press your vegetables down so they stay submerged in their own brine.
- Watch for mold (fuzzy white or green spots), which means something went wrong; discard that batch and troubleshoot your salting or fermentation vessel next time.
- Taste regularly to track how your batch evolves, and you'll develop an instinct for when it's exactly how you like it.
 Pin It
 Making kimchi teaches you that good food doesn't require fancy equipment or exact timing—just clean ingredients, attention, and time. Now when I reach into my fridge for that familiar glass jar, I'm reaching for weeks of work compressed into something I've grown to love.
Recipe FAQs
- → How long does kimchi fermentation take?
Fermentation typically requires 1-2 days at room temperature, followed by refrigeration. The flavor continues developing over several weeks, becoming more tangy and complex over time.
- → Can I make kimchi vegan?
Replace traditional fish sauce with soy sauce or vegan fish sauce alternatives. The fermentation process works identically, and you'll still achieve that characteristic umami depth.
- → What gives kimchi its red color?
Korean red chili flakes called gochugaru provide the signature vibrant red hue and spicy heat. Adjust the quantity from 3-5 tablespoons based on your preferred spice level.
- → Why is rice flour used in the spice paste?
Rice flour creates a smooth, thickened paste that helps seasonings adhere evenly to the cabbage leaves. It also provides subtle starch that supports beneficial bacterial growth during fermentation.
- → How do I know when kimchi is ready to eat?
Taste after 48 hours of room temperature fermentation. When the flavor reaches your desired balance of tangy, spicy, and sour, transfer to cold storage. The kimchi continues fermenting slowly in the refrigerator.
- → What should I do if gas builds up in the jars?
Burp the jars daily by opening slightly to release accumulated fermentation gases. This prevents pressure buildup and potential mess. Keep jars away from direct sunlight during the fermentation process.