 Pin It
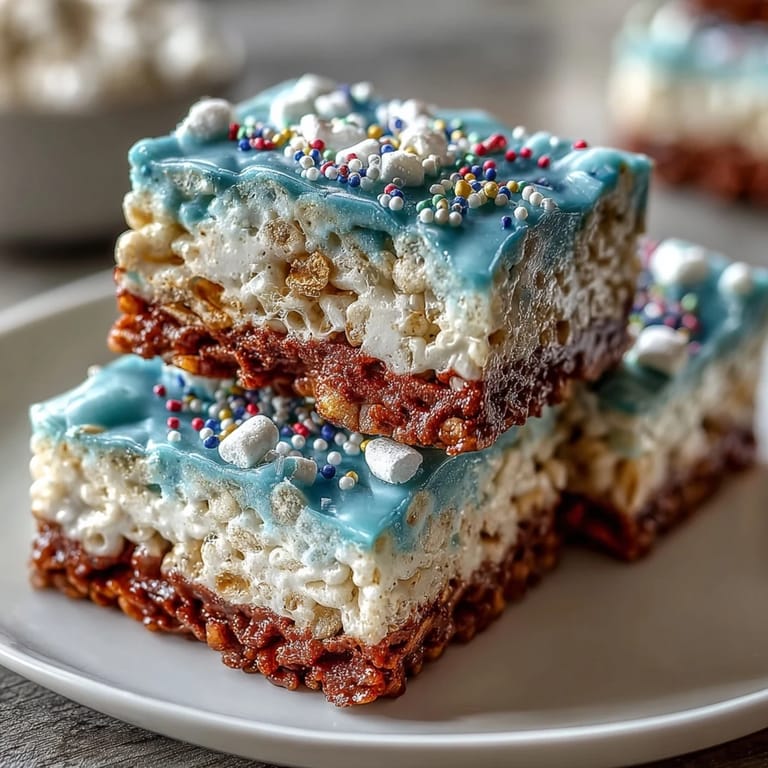
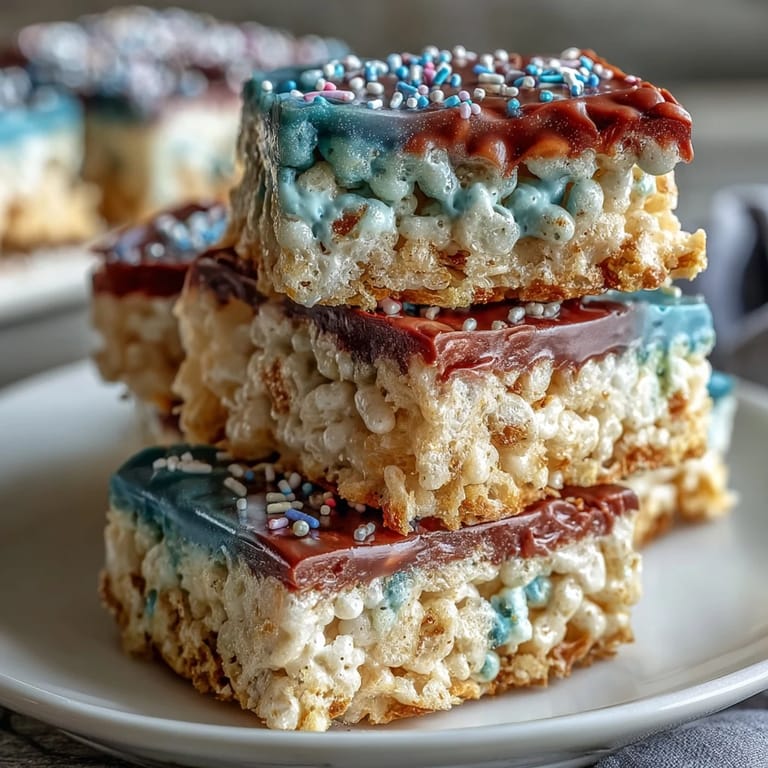
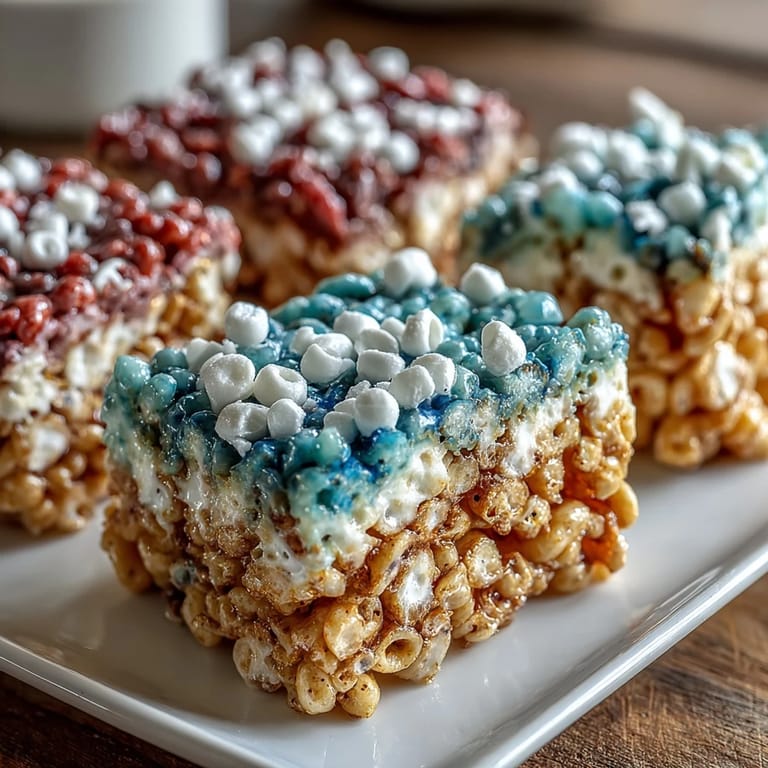
 My neighbor showed up at my door last summer with a pan of these layered treats, and I couldn't stop eating them—there was something about the way the colors caught the light that made them feel celebratory, not just sweet. I asked for the recipe that same afternoon, and within days I was melting marshmallows in my kitchen with the back door open, letting the summer air drift through. What started as curiosity turned into an annual tradition, one I now make every Fourth of July without fail, usually while humming something patriotic and not caring how off-key I sound.
I brought these to a backyard gathering a few years ago, and they disappeared so fast I barely got a photo before someone grabbed the last square. A friend who never bakes came up to me afterward asking for the secret, convinced I'd spent hours layering them by hand—her surprise when I admitted the whole thing takes less than thirty minutes became the best part of the day.
Ingredients
- Rice Krispies cereal: Six cups gives you the right crunch-to-marshmallow ratio; don't skimp or your treats will turn gummy.
- Mini marshmallows: One 10-ounce bag, divided evenly—they melt faster than full-size ones, which saves you time and frustration.
- Unsalted butter: Three tablespoons total, portioned into thirds so each layer gets equal treatment and bonds properly.
- Vanilla extract: Half a teaspoon goes into the white layer alone, making it taste distinct from the other two.
- Red and blue gel food coloring: Gel is non-negotiable here because liquid food coloring turns the mixture watery and ruins the texture you've worked to build.
- Red, white, and blue sprinkles: Optional but honestly worth the effort—they finish the look and give you an excuse to get fancy.
Tired of Takeout? 🥡
Get 10 meals you can make faster than delivery arrives. Seriously.
One email. No spam. Unsubscribe anytime.
Instructions
- Set Up Your Canvas:
- Line a 9x9-inch pan with parchment paper and grease it lightly so the treats release without argument. This step feels small but saves you from a frustrating cleanup later.
- Divide Before You Start:
- Split your marshmallows and butter into three equal portions right from the beginning—about 3 1/3 cups marshmallows and 1 tablespoon butter per layer. Having everything measured out keeps you from getting confused midway through.
- Make the Red Layer:
- Melt 1 tablespoon of butter over low heat in your saucepan, then add 3 1/3 cups of marshmallows and stir constantly until they're completely smooth and glossy. Once they're melted, add drops of red gel coloring until the shade feels right to you—I usually go for something bold but not neon.
- Combine and Press:
- Stir in 2 cups of Rice Krispies until every piece is coated, then transfer the mixture to your prepared pan and press it evenly across the bottom using greased hands or a greased spatula. Work quickly because this mixture sets faster than you'd expect.
- Build the White Layer:
- Wipe your saucepan clean, then repeat the butter-and-marshmallow process with the second portion. Once melted, stir in the vanilla extract so this layer tastes subtly different from the others.
- Add the Cereal and Layer:
- Mix in the second batch of Rice Krispies, then gently press this white mixture over the red layer, using a light touch so you don't squash everything together. You want distinct layers, not a color-bleed situation.
- Top with Blue:
- Clean the pan one more time, melt your final butter and marshmallow portion, stir in blue gel coloring, and fold in the last 2 cups of Rice Krispies. Press this final layer on top and imagine fireworks while you do it.
- Optional Sparkle:
- If you're using sprinkles, scatter them over the top while the mixture is still warm enough for them to stick slightly. They'll catch the light and make the whole pan look like you spent way more effort than you actually did.
- Cool with Patience:
- Let everything rest for at least 1 hour—I know it feels long, but this time is when the layers actually set and stay distinct. Once cooled, use the parchment to lift the whole thing out, slice into sixteen squares, and watch them vanish.
 Pin It
 There's a moment while these treats are cooling when your kitchen smells like pure childhood, sweet and buttery and full of possibility, and it hits different on a summer day. My niece once sat on the kitchen counter at 6 a.m. waiting for them to set, and when I finally let her have one, she announced it was the best thing she'd ever tasted—which, from a seven-year-old, felt like winning an award.
Why Gel Food Coloring Changes Everything
The first time I made these, I grabbed liquid food coloring from my pantry because it was there, and the whole batch turned into a sticky, gloppy mess that I ended up throwing away. I learned that day that not all coloring is created equal—gel sits on top of the marshmallow mixture without adding water, keeping the texture chewy instead of damp. Now I keep gel coloring on hand specifically for treats like this, and it's made a noticeable difference in every batch I've made since.
The Parchment Paper Hack
Using parchment paper isn't just convenient; it's the difference between a perfect square and a mangled piece that falls apart when you try to pick it up. I used to butter the pan directly and spend twenty minutes trying to slice cleanly without the whole thing crumbling, but once I started lining with parchment, the slicing became almost meditative. The treats lift out as one cohesive block, and cutting them feels like you're actually in control of something for once.
Storage and Make-Ahead Magic
These keep beautifully for up to three days in an airtight container, so you can make them the day before a gathering and avoid last-minute stress. I learned that stacking them between parchment sheets prevents them from sticking together, which seems obvious in hindsight but saved me from a frustrating afternoon once.
- Keep them in an airtight container away from humidity or they'll lose their texture.
- Room temperature is perfect for storage—the refrigerator will actually make them harder to enjoy.
- If you somehow have leftovers past three days, they're still edible, just slightly firmer than ideal.
 Pin It
 These treats are proof that the simplest recipes often become the ones people remember most. Make them, share them, and let the colors remind everyone why summer celebration tastes like childhood joy.
Recipe FAQs
- → How do I achieve vibrant red, white, and blue colors?
Use gel food coloring for each layer to get bright, bold colors without making the mixture too wet. Stir the coloring into melted marshmallows before adding cereal.
- → What is the best way to prevent sticking while pressing layers?
Lightly grease your hands or a spatula with butter or oil to press each layer evenly without sticking.
- → Can I add any flavors to the white layer?
Yes, adding vanilla extract to the white layer enhances its flavor and complements the colored layers nicely.
- → How long should the layers cool before cutting?
Let the layers cool and set for at least one hour to ensure clean cuts and firm texture.
- → Can I prepare these treats ahead of time?
Store the finished treats in an airtight container for up to three days to maintain freshness and chewiness.