 Pin It
 Last autumn, when the maple leaves turned fiery orange, I discovered the simple magic of acorn squash soup on a rainy afternoon. My kitchen window was fogged from the stovetop steam as I roasted that first batch of squash, its caramel aroma filling every corner of my home. There's something about the transformation of this humble gourd into velvet liquid gold that still captivates me. I remember being surprised by how the natural sweetness intensified with each step of the process.
My neighbor Sarah stopped by unexpectedly while I was blending that first batch of acorn squash soup, curious about the heavenly scent wafting from my kitchen. What started as a casual sample turned into an impromptu dinner party when she called her husband to join us. We ended up huddled around my small table, dipping crusty bread into steaming bowls and laughing as the rain pattered against the windows. Even now, Sarah texts me when the first acorn squashes appear at the farmers market.
Ingredients
- Acorn squash: Look for squash that feels heavy for its size with a hard, unblemished exterior, as Ive found the denser ones have a more concentrated sweetness.
- Yellow onion: The humble yellow onion creates the aromatic foundation here, and Ive learned not to rush the sautéing process as it develops complexity that carries the entire soup.
- Garlic: Fresh minced garlic adds a subtle warmth that complements the sweet squash, but I discovered crushing it with the side of a knife before mincing releases even more flavor.
- Vegetable broth: This liquid backbone infuses depth throughout, and Ive found that homemade broth with roasted vegetables makes an extraordinary difference if you have the time.
- Heavy cream or coconut milk: This finishing touch transforms the texture from merely smooth to luxurious, with coconut milk adding a subtle tropical note that surprisingly works beautifully with the squash.
Tired of Takeout? 🥡
Get 10 meals you can make faster than delivery arrives. Seriously.
One email. No spam. Unsubscribe anytime.
Instructions
- Roast the squash:
- Preheat your oven to 400°F and brush those halved squash pieces with olive oil before placing them cut-side down on your parchment-lined baking sheet. Youll know theyre ready when your kitchen fills with a sweet, nutty aroma and a fork slides easily into the flesh, usually around 35 minutes.
- Build the flavor base:
- While your squash roasts, transform your pot into an aromatic wonderland by gently sautéing the onion, carrot, and garlic until they soften and become fragrant. This foundation creates depth that will carry through the entire soup.
- Marry the ingredients:
- Once your squash has cooled enough to handle, scoop that beautiful orange flesh into your pot along with the broth, water, and all those warming spices. Let everything simmer together and get acquainted for about 10 minutes, allowing the flavors to meld into harmony.
- Transform with blending:
- Now for the magical transformation from chunky mixture to silken soup. I find an immersion blender creates less mess, but a regular blender works beautifully too if you work in batches and remember to vent the steam.
- Final enrichment:
- Stirring in that cream or coconut milk creates the most luxurious texture and rounds out all the flavors. Take a moment to taste and adjust any seasonings, as sometimes a little extra salt or pepper makes all the difference.
 Pin It
 Last Thanksgiving, my brother who claims to hate all things squash-related helped himself to a second bowl before asking what he was eating. The look of shock on his face when I revealed it was acorn squash soup still makes me smile. He sheepishly admitted that maybe he didnt hate squash after all, just the way our mother used to prepare it with brown sugar and marshmallows. Sometimes all it takes is a different preparation to transform someone's relationship with an ingredient.
Garnishing Your Masterpiece
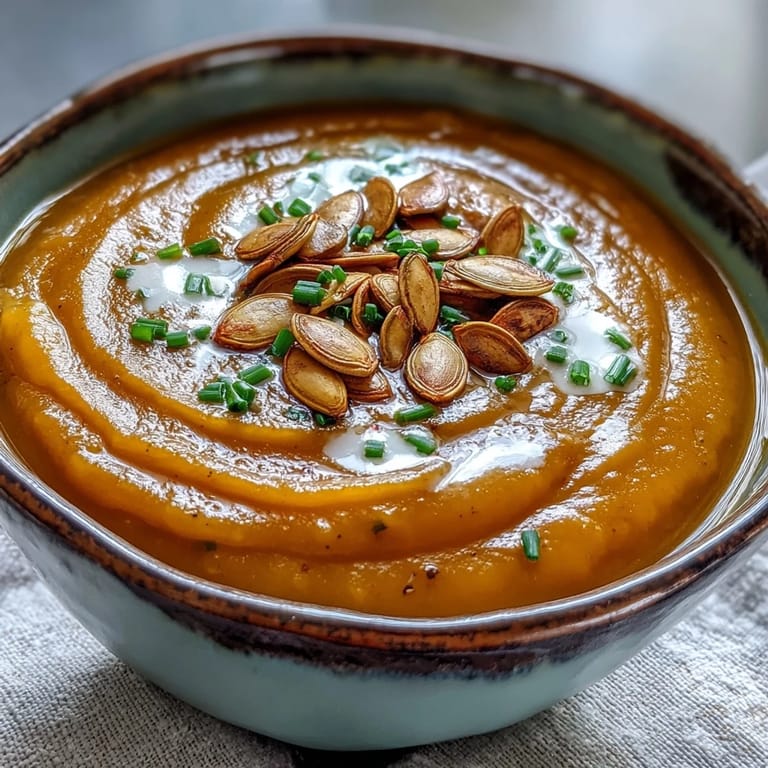
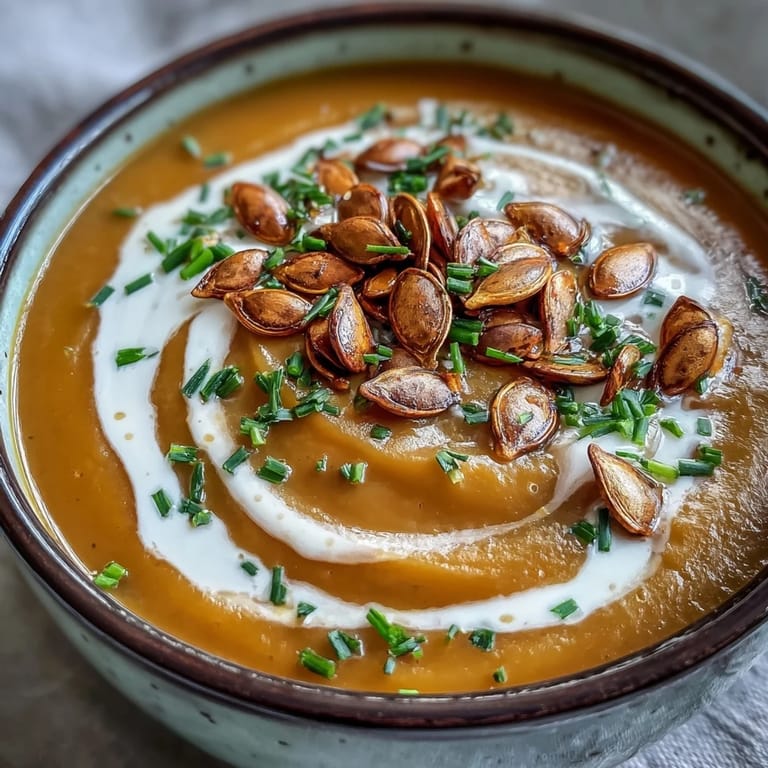
The final presentation elevates this soup from homemade to restaurant-worthy with minimal effort. I discovered that toasted pumpkin seeds add the perfect textural contrast to the velvety soup, especially when toasted with a touch of salt until they just begin to pop. A light drizzle of cream creates beautiful patterns that make each bowl feel special, even when Im dining alone on a weeknight. The visual appeal actually enhances the flavor experience, engaging multiple senses before the first spoonful reaches your lips.
Storage and Make-Ahead Tips
This soup develops even deeper flavor overnight, making it perfect for meal prep or entertaining. Ive kept it refrigerated for up to four days, finding that storing it without the cream and adding that final touch when reheating produces the best results. For longer storage, freeze the soup in individual portions before adding cream, then thaw overnight in the refrigerator before gently reheating. The texture remains surprisingly consistent after freezing, unlike many cream-based soups that can separate when thawed.
Seasonal Variations
Throughout the years, Ive adapted this recipe to reflect the changing seasons, discovering new favorite combinations. Summer brings the option to garnish with fresh basil and a swirl of pesto for brightness, while winter calls for a heartier version with a dash of smoked paprika and roasted chestnuts on top. In spring, I sometimes add a handful of tender young spinach during blending for a vibrant green variation that celebrates the seasons renewal.
- For a spicier version, add a single star anise pod during simmering and remove before blending, which adds warmth without overpowering.
- Try serving this soup chilled during summer months with a squeeze of lime and chopped cucumber on top for a refreshing twist on the classic.
- For special occasions, a tablespoon of maple syrup added during the final heating enhances the natural sweetness and adds complexity.
 Pin It
 This acorn squash soup has become my signature dish, requested at gatherings and quietly prepared on days when comfort is needed most. There's something profoundly satisfying about transforming such humble ingredients into something that brings genuine joy to those around your table.
Recipe FAQs
- → How do I know when the acorn squash is properly roasted?
The squash is ready when the flesh yields easily to a fork and feels tender throughout. This typically takes 30–35 minutes at 400°F. Allow the squash to cool slightly before scooping out the flesh to avoid burns.
- → Can I make this soup ahead of time?
Absolutely. This soup actually tastes better the next day as flavors have time to meld. Store in an airtight container in the refrigerator for up to 4 days. Reheat gently over low heat, adding a splash of broth or cream if needed to adjust consistency.
- → What's the best way to achieve a smooth texture?
An immersion blender works beautifully directly in the pot. If using a countertop blender, work in batches and vent the lid to allow steam to escape. Blend for 1–2 minutes until completely silky. Straining through a fine-mesh sieve creates an ultra-refined texture if desired.
- → How can I add more protein to this dish?
Stir in white beans or lentils during the simmering stage for added protein and fiber. Alternatively, serve with grilled cheese, crusty bread topped with cheese, or a side of roasted chickpeas. A dollop of Greek yogurt also boosts protein while adding tanginess.
- → Can I freeze this soup?
Yes, freeze before adding the cream or coconut milk. Cool completely, then transfer to freezer-safe containers leaving an inch of space at the top. Freeze for up to 3 months. Thaw overnight in the refrigerator, reheat, and stir in the cream just before serving.
- → What other winter squash works well in this soup?
Butternut squash offers a similar sweetness and creamy texture. Delicata, kabocha, or Hubbard squash also work beautifully. Each variety brings subtle flavor differences—kabocha is earthier, while delicata has a milder, slightly nutty taste. Adjust roasting times based on squash size.